ADVERTISEMENT
The method of removing mold from the caulk in your shower is not very difficult. A few items that you most likely already have lying around the home, as well as around one hour of your time, are all that are required.
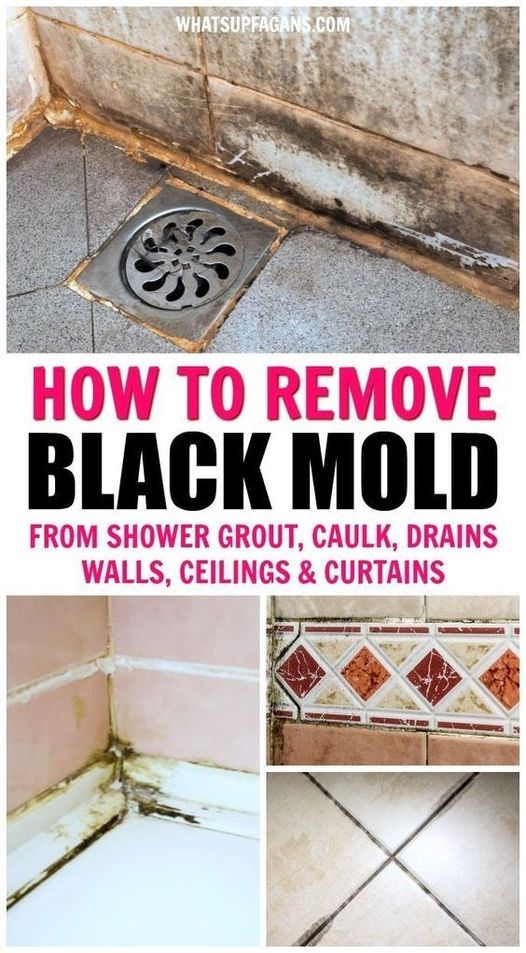
Attempting to clear moldy caulk may be found within. If you want to learn how to remove mold from caulk, check out these simple suggestions. When it comes to removing mold from shower caulk, it works quite well.
When we were in our master bathroom shower a few years ago, we decided to redo the tiling. At first, it seemed to be in excellent condition; but, over a period of time, the caulk began to develop some mold on it. Rather of removing all of the caulk, I opted to go through and clean the moldy caulk instead. I didn’t really feel like doing it for some reason.
The method of removing mold from the caulk in your shower is not very difficult. A few items that you most likely already have lying around the home, as well as around one hour of your time, are all that are required. In the event that you are interested in getting rid of the mold, you should read this simple instruction on how to remove mold from caulk.
An old toothbrush, a cup that can be thrown away, baking soda, and bleach are the things you will need to get started. Combine about half a cup of bleach with approximately one cup of baking soda in a cup that is disposable. It’s possible that you just need to perform a little amount of each at a time. Depending on the kind of bleach that you use, the quantities that you will need will be different. In order for your mixture to adhere to the moldy caulk, you will need to get it to the consistency of toothpaste.
Once you have it blended to a thick paste, then use the old toothbrush to apply it to the caulk that is moldy. Before applying it to the caulk, you should probably do a spot test on a tiny area to ensure that it does not harm the tile. It is essential that it be applied thickly enough to completely cover the caulk. After setting a timer for around half an hour, you should simply let it sit. Due to the fact that it has such a strong odor, you may want to open a window or switch on a vent in the bathroom.
After a period of thirty minutes, examine the bleach mixture to ensure that it is still completely coating the caulk. Should it be necessary, add some more bleach mixture to the caulk. After that, set a timer for about another half an hour.
When the bleach mixture has been allowed to sit for more than an hour, you may next use the toothbrush to scrub the caulk for thirty seconds to an hour. After that, to remove the bleach combination, wash it away with warm water. You need to make sure that the bleach combination is completely removed from the caulk and that it is flushed down the drain completely.
In the event that you still observe mold on the caulk, you have the option of doing the methods once more in order to eliminate all of the mold. It is clear that the use of this bleach combination for only one time resulted in a significant improvement to the appearance of my shower.
It is possible to restore the appearance of the caulk to that of brand new by following a few simple instructions on how to remove mold from caulk. Do you want some further simple cleaning tips? Check out the simple method that does not need you to scrub your shower doors. Without putting in a lot of effort, you may make the shower doors clean and bright so that they look like new.
ADVERTISEMENT
