
ADVERTISEMENT
If your oven has a self-cleaning setting, enable it and allow the cycle to complete. However, if your oven lacks this feature, set it to 425 degrees Fahrenheit and check the pan after two hours. When the cycle is done, take the pan out of the oven and let it cool. At this stage, while the pan may still appear rusty, most of the built-up residue should be loose.
Step 3: Soaking and Degreasing
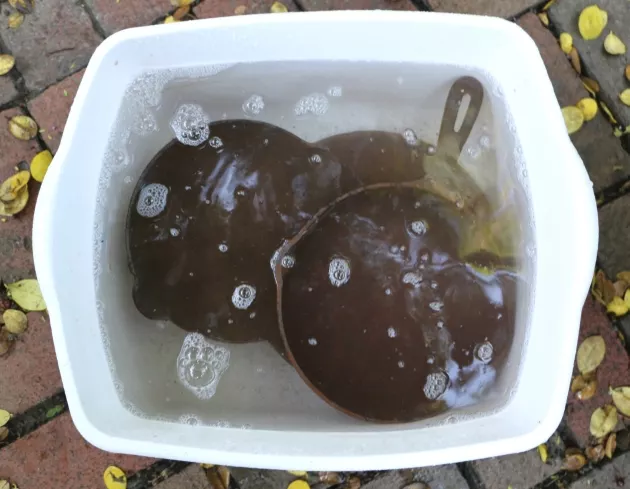
Prepare a solution by combining equal parts water and white vinegar and adding a tablespoon of liquid dishwashing detergent. Soak the cast-iron pan in this mixture for about three hours.
Step 4: Cleaning and Drying
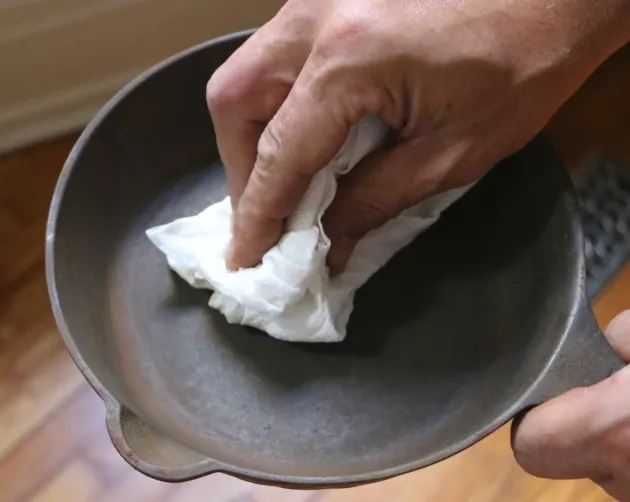
Remove the pan from the soaking solution and rinse it thoroughly. Wipe away any remaining dirt using a paper towel or a rag until the pan is completely dry.
Step 5: The Seasoning Process
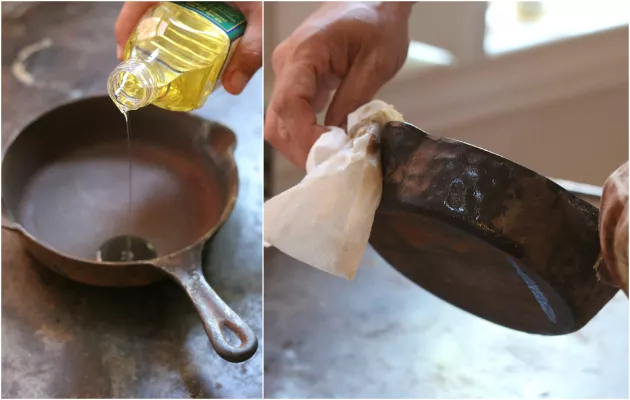
Now it’s time to season the pan, a crucial step in creating a non-stick surface that, when properly maintained, will last a lifetime. Apply a thin layer of peanut oil to the pan’s interior, exterior, and handle.
Step 6: Final Seasoning
Place the pan upside down on the top shelf of your oven and heat it at 350 degrees Fahrenheit for one hour. This process allows the pores of the cast iron to absorb the oil and then seal them shut as it cools, preserving the oil and creating a gleaming finish. Once removed from the oven, your pan is ready for use.
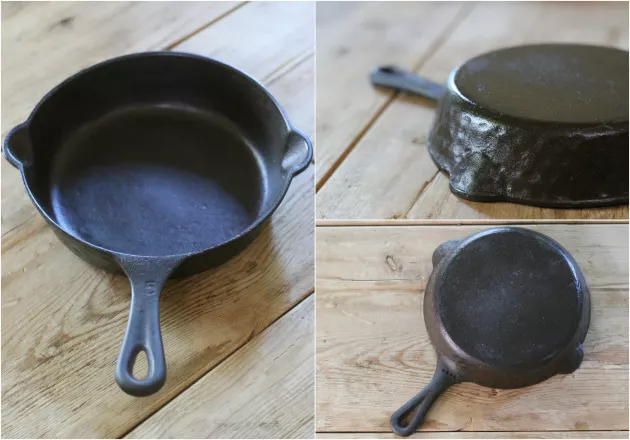
Before and After
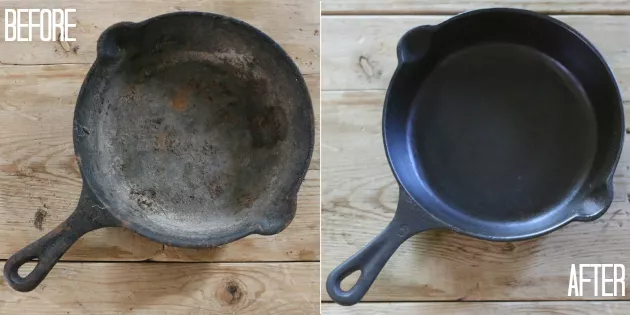
This restoration method breathes new life into cast-iron cookware that might otherwise be destined for the trash. The result is a beautifully revived piece of culinary history, perfect for both cooking and display. These timeless kitchen companions are truly invaluable when given the care they deserve.
ADVERTISEMENT
