ADVERTISEMENT
Super Easy Microwave Corn on the Cob: No Shucking Required
Step-by-Step Instructions
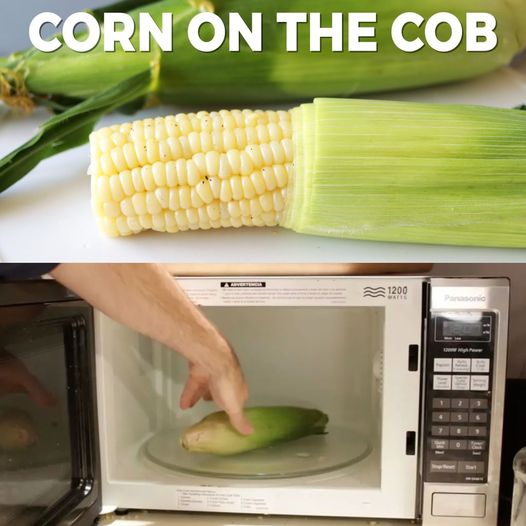
1. Prepare the Corn: Choose fresh corn with the husks still on. There’s no need to peel or remove the silks as they come off easily after the corn is cooked.
2. Cook the Corn: Place one or two ears of corn (depending on the size of your microwave) in a microwave-safe dish. No need to add water or moisten the corn; the natural moisture in the husks will steam the kernels inside.
3. Set the Time: Microwave on high power for about 3-4 minutes per ear of corn. If you’re cooking multiple ears, you might need to add a couple more minutes to the total time. Adjust the time based on your microwave’s wattage and the number of ears you’re cooking.
4. Remove and Rest: Carefully remove the dish from the microwave using a kitchen towel or oven mitts – it will be very hot. Let the corn sit for a couple of minutes; this makes it easier to handle and finishes the cooking process.
5. Shuck the Corn: Once it’s cool enough to handle, cut off the stem end about 1 inch above the bottom. Hold the top of the husk (the end where the silk protrudes) and shake the ear. The corn should slide out clean, leaving the silk and husk behind.
6. Serve: Serve the corn warm. If desired, you can brush it with a little butter and sprinkle with salt, herbs, or other seasonings to enhance its natural sweetness.
Enjoy Your Meal
This microwave method for cooking corn on the cob is not only incredibly easy but also impressively effective. The corn turns out juicy and flavorful, and the cleanup is minimal. It’s a perfect way to enjoy one of the best tastes of summer (or any season, if corn is available) with minimal effort and time. Enjoy your perfectly cooked, effortlessly prepared corn on the cob!
ADVERTISEMENT
