ADVERTISEMENT
Step-by-Step Process:
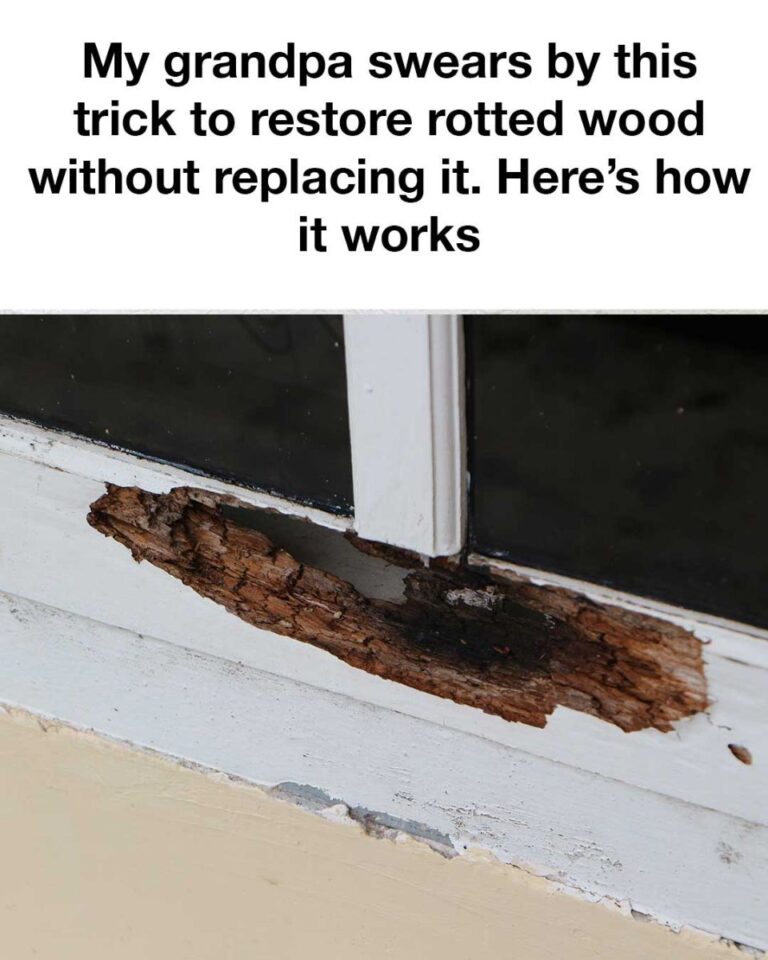
- Identify and Assess the Rot:
Start by inspecting the affected wood. Gently probe the area with a utility knife or chisel to determine the extent of the rot. The rotted wood will often feel soft and crumbly. - Remove the Rotted Wood:
Use the chisel to carefully remove all the decayed wood. Be sure to get rid of every bit of the rotted material, as any remaining rot could continue to spread. - Apply Epoxy Wood Consolidant:
After cleaning out the area, mix and apply the epoxy wood consolidant to the remaining, solid wood. This will help stabilize the wood and prevent further rot. Let it cure as per the manufacturer’s instructions, usually 24 hours. - Fill in the Area:
Once the epoxy is fully cured, use a putty knife to apply wood filler to the cleaned-out space. Smooth it out to restore the wood’s original shape and structure. - Sand and Finish:
After the filler has dried, use sandpaper to smooth the surface. Finish by painting or staining the repaired area to match the rest of the wood.
Benefits of This Method:
- Cost-effective: No need to replace entire wooden structures or furniture.
- Easy for DIYers: You don’t need to be an expert to do this.
- Environmentally Friendly: Minimizes waste by restoring the wood rather than replacing it.
- Durable: If properly done, the restored wood can last for many years.
Expert Tips from Grandpa:
- Test First: Always test a small, inconspicuous area before applying epoxy or filler to ensure compatibility with your existing wood.
- Dry Conditions: Work in dry weather to avoid introducing more moisture into the wood during the process, which can lead to future rot.
- Proper Curing: Ensure the epoxy consolidant has fully cured before moving on to the wood filler.
Common Mistakes to Avoid:
- Not Removing All the Rot: Leftover rotted wood can continue to spread, so make sure to remove every bit.
- Rushing the Cure: Don’t rush through the process—give the epoxy and filler time to properly dry and cure before proceeding to the next step.
Real-Life Success Stories:
Many people have successfully used this method to restore antique furniture, outdoor decks, and even structural beams. It’s a reliable technique that proves wood can be saved and restored with the right approach.
Frequently Asked Questions:
- How long does it take?: The process typically takes a weekend, allowing for drying and curing times.
- Can it be used on all types of wood?: Yes, but always test a small area first to ensure compatibility.
- How long will the restored wood last?: With proper maintenance, the restored wood can last many years.
Conclusion:
Restoring rotted wood doesn’t have to be daunting or expensive. With this easy technique, you can repair and renew wood to its former glory. Grandpa’s method proves that even the most deteriorated wood can find new life with a little patience and the right materials. Happy restoring!
ADVERTISEMENT
