ADVERTISEMENT
Steps:
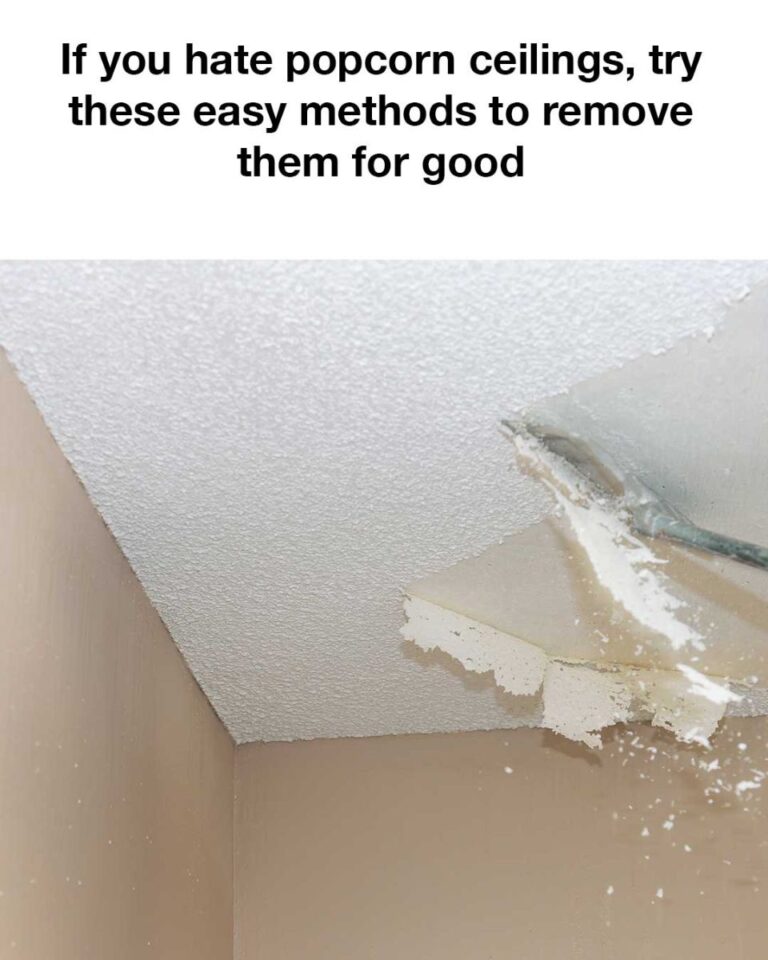
Prepare the Ceiling: Use a putty knife or a popcorn ceiling scraper tool to gently scrape a small section of the ceiling without wetting it.
Scrape Gently: This method requires a bit more elbow grease. Hold the scraper at a slight angle and carefully scrape away the popcorn texture. Try to avoid gouging the ceiling.
Work in Small Sections: Continue working in small sections until the entire ceiling is smooth.
Clean Up Dust: The dry scrape method creates a lot of dust, so it’s important to wear a mask and goggles, and to thoroughly clean the area afterward.
Method 3: Covering with a New Layer
If scraping sounds too daunting or if your ceiling contains asbestos, you might consider covering the popcorn ceiling instead of removing it. This method involves adding a new layer of drywall or ceiling tiles over the existing texture.
Steps:
Measure and Cut Panels: Measure your ceiling and cut drywall panels or ceiling tiles to size.
Attach the Panels: Using drywall screws, attach the panels directly over the popcorn ceiling. Make sure to screw into the ceiling joists to ensure a secure fit.
Tape and Mud the Seams: Use joint tape and compound to cover the seams between the panels. Smooth out the compound with a putty knife and allow it to dry.
Sand and Paint: Once the compound is dry, sand the seams smooth and then prime and paint the new ceiling surface.
Method 4: Skim Coating
Skim coating is another option if you want a smooth ceiling without removing the popcorn texture. This involves applying a thin layer of joint compound over the entire ceiling.
Steps:
Apply Joint Compound: Using a wide putty knife or trowel, apply a thin layer of joint compound over the popcorn texture. Work in small sections to ensure an even application.
Smooth the Surface: Smooth out the compound with your putty knife, feathering the edges to blend with the existing ceiling.
Let It Dry and Sand Smooth: Allow the joint compound to dry completely. Once dry, use a sanding pole with fine-grit sandpaper to smooth the ceiling.
Prime and Paint: After sanding, prime the ceiling to prepare it for painting, and then apply your chosen paint color.
Final Touches
After you’ve removed or covered your popcorn ceiling, consider adding the following finishing touches to complete your ceiling renovation:
Prime and Paint: If you’ve scraped the ceiling or applied a new layer of drywall, make sure to prime the ceiling to seal the surface before painting.
Choose a paint that complements the rest of your room.
Add Decorative Molding: Crown molding or decorative trim can add a touch of elegance to your newly smoothed ceiling.
Install New Lighting: Now that your ceiling is smooth, consider updating your lighting fixtures to enhance the room’s look.
Removing popcorn ceilings can be a messy and time-consuming task, but the results are well worth the effort. Whether you choose to scrape, cover, or skim coat your ceiling, you’ll enjoy a modern, clean look that can significantly enhance the appearance of your home. By following these methods, you can say goodbye to popcorn ceilings for good and enjoy a fresh new look in your space.
ADVERTISEMENT
